Friday, September 13, 2013

Inspiration Overload: the Hunted Interior

Get ready for a boat load of inspiration today, guys. A yellow door, cozy dining room, perfect gallery walls -- all of which are affordable. What's not to love? I first discovered Kristin Jackson of the Hunted Interior on The Everygirl featuring her home tour, and I keep finding myself going back to her website for ideas and inspiration. It was love at first sight --with her home that is. She's got an entire website dedicated to her DIY tutorials so that pretty much makes us best friends. Filled to the brim with pretty dressers (Can you guess which ones are DIY?), end tables, trinkets, and a killer desktop image. Have a look for yourself...


The dining room is my favorite room in the house. Its layers are absolutely perfect, down to the stuffed fireplace, built-in shelving and gallery wall. I love a home that feels so cozy to the point where it almost feels crowded. 


Such a fan of the mismatched end tables.


A colorful home filled with life and functionality. Happy Friday!

Wednesday, September 11, 2013

Wednesday Wish List 9.2

jcrew, lulu and georgia, zara, fall, amo, clothes, boots, tray, pants, vegan leather, handbag, clutch, wish list, a hammer & heels

Quilted Jacket It's almost fall which means it's time to break out the moto jackets! Love the green color on this one. I have a hard time finding the right fit for moto jackets. Nothing is worse than ordering online and finding out the jacket is too tight in the arms or too big everywhere else. Does anyone know how Zara's jackets fit? Big? Small? // Can't stop swooning over these Bonny boots. Can you say perfect fall boot? I'm hunting for a similar, more affordable pair with the black and tan combo but am having no such luck. {Sigh} So far these are the closest I've found from Zara. Still cool but not quite as high swoon factor going on. I wear a size 9 if anyone's feeling generous today. Just kidding. But seriously. // Vegan Leather Clutch This week I was introduced to Mishqua, quite possibly the coolest lady and handbag collection ever. There isn't one item I don't want!  // Camo Pants These need to get in my closet now. I'd like to think I've been a fan of camo for a few years now (My boyfriend is a big hunter so that counts, right?) but my closet says otherwise. I'm loving all of this camo but please don't go for the head to toe look like the Robertson family on Duck Dynasty. No bueno. // Tray One can never have enough trays on the nightstand, desk, shelf, and bathroom vanity for displaying dainty jewelry and a collection of Fresh lip balms. 

I have a special place in my heart for all of those affected and the first responders of 9/11. Let's remember them and what each one did to help in such a time of need.


Monday, September 9, 2013

Make It: Tie Dye Pillows


DIY, pillows, home, decor, tie dye, rebecca atwood, homemade, A Hammer & Heels


Yet another DIY project to share with you guys! Pillows are a great way to add color and pattern to a room on a low budget. Mix and match different colors and textures for a room with tons of interest, and if you're like me, you can change them up often and swap out for a new look without breaking the bank.

My inspiration for these pillows came from Rebecca Atwood's gorgeous pillow collection. I wanted something blue with a natural look, similar to tie dye. I've done my share of tie-dying back in the day, so I decided to make my own budget-friendly version.

The supplies:
Pillow covers - $4 each, Hobby Lobby
Dye - on hand (periwinkle)
Bleach pen - $2, Target
Rubber bands
Total Cost
$10

Step 1:
Follow the direction on the back of the dye box. I dissolved mine in a gallon ice cream bucket of water since I only had one box of dye and I wanted the color to be really concentrated.

Step 2:
I started with the dip dye pillow. After soaking the pillow cover in water, I slowly dropped one end of the damp pillow cover into the bucket of dye. I let it sit for a few minutes, and then dipped the pillow cover even farther into the bucket of dye for a total of maybe 5 minutes. (Letting the pillow cover soak for a few minutes and then dipping it farther into the dye creates the ombre effect.)

Step 3:
For the second pillow I wrapped 3 evenly spaced rubber bands around the pillowcase creating a "cylinder". Then I submerged the entire pillow case into to the bucket of dye. Since it was the second round of dying, I found I had to leave this pillow case in the dye a little longer than the first pillow to get the same color. After about 8 minutes I took the pillow cover out of the dye.

Step 4:
Rinse out the pillows until the water run completely clean.

Step 5:
After the second pillowcase dried, I  could see the results a little better. The rubber band lines weren't as evident as I hoped for, so I ended up taking a bleach pen and "drawing" in the lines. Rinse it clean from the bleach.

That's it! Overall it was a pretty easy project. Of the two, the dip dye ombre pillow is probably my favorite. If you're going to try the rubber band technique make sure they are wrapped very tightly around the fabric. I don't think mine were tight enough so dye was still able to flow into those areas.

Which one is your favorite? Send me a link if you try it yourself! Get creative and see what other techniques you come up with!


Saturday, September 7, 2013

Make It {Starburst Mirror}

starburst mirror, DIY, mirror, homemade, craft, bar car, inexpensive, project, sunburst mirror, pink, A Hammer & Heels
More Mojitos Please  art

starburst mirror, DIY, mirror, homemade, craft, bar car, inexpensive, project, sunburst mirror, pink, A Hammer & Heels


Today I'm sharing an inexpensive DIY project with a big impact  that I recently finished. Starburst mirrors are great but can be rather expensive. I wanted something to hang above my bar cart and decided a starburst mirror it was. The inspiration behind this came from the crafty ladies at A Beautiful Mess. You can see their version of a starburst mirror here. They actually spray painted theirs gold, but I wanted something a little more natural looking so I kept the wood look.

The supplies:
A round mirror - Hobby Lobby, $8
Paint sticks - your local hardware store, I got mine at Menard's for free. They usually hand them out when you buy paint but I just asked for them.
Hot glue gun
A piece of wood about 1 inch thick to mount on the back of the mirror

Total Cost
$8 (everything else I had on hand) 


Step 1:
You want to mount something on the back of the wood so the mirror will lay flush against the wall after you start gluing the sticks on the back. It also makes hanging the mirror much easier if there is a place to drill a hole. I just glued a scrap piece of wood that's about an inch thick on the back of my mirror with some wood glue. Make sure to allow for the full drying time so it's secure.

Step 2: 
Stain your paint sticks. I used a stain we already had on hand and just wiped each blank side of the stick with a cloth that was dipped in the stain. I only did one coat because I wanted a light color.

The paint sticks pre-stain. Stain only the blank side, not the side with print, because that's the only side that will be showing from the front. 


Step 3:
Cut your paint sticks. Because I only got 25 paint sticks from Menard's I needed to cut each stick in half so I had enough to go around the mirror. My dad cut them for me with a saw so I had a nice even line rather than breaking them, that way I could use the opposite end of the handle.  


Step 4:
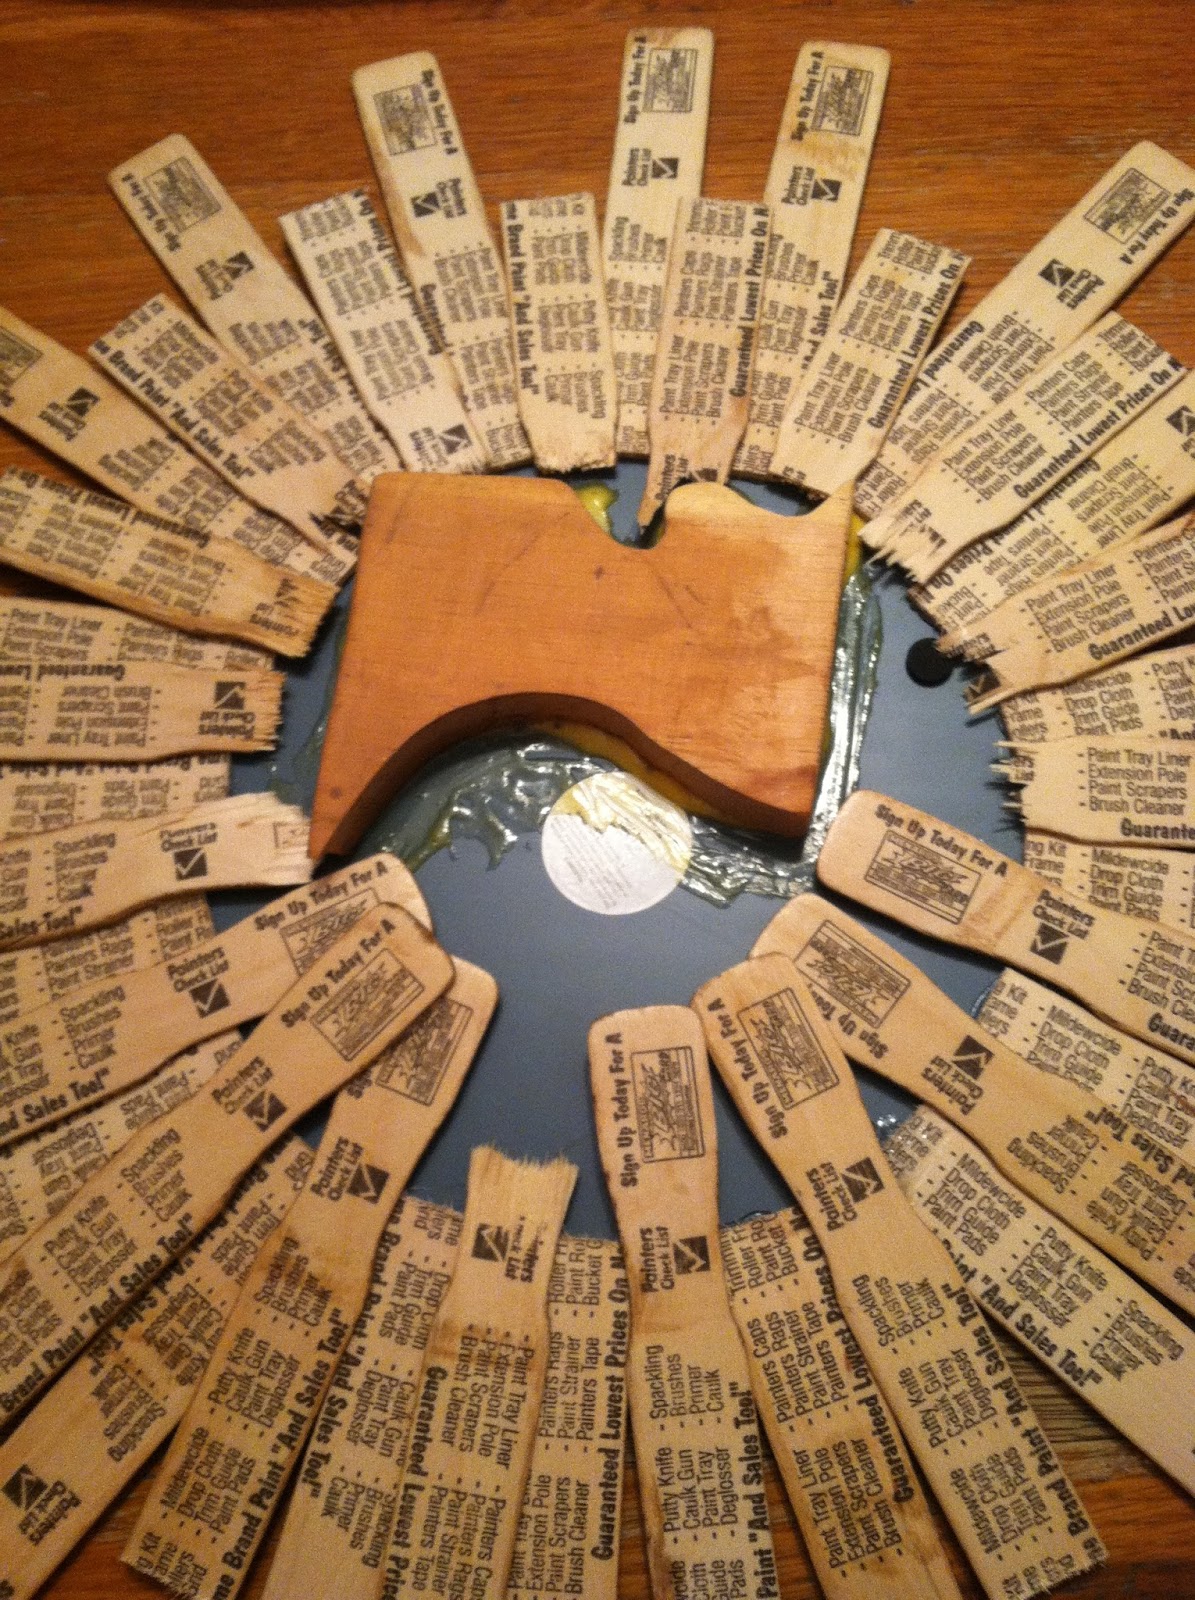
Arrange your sticks around the mirror. Before I glued each stick down to the backside of the mirror, I arranged them so I had an idea of placement. I started with the longer sticks and placed them evenly around the mirror leaving about 1 inch-1.5 inch gap between each. Then I filled in the gaps with the shorter sticks making sure to overlap the longer stick a little bit. I ended up having just enough sticks to go around once with the long sticks and once with the short sticks with just a few remaining to fill in where there were some bigger gaps. 


The sticks with the narrow handles (you can see in the picture above) I call the shorter ones. Since I didn't want the narrow handle to show I made sure they were far enough on the back of the mirror. It will make sense  once you're arranging them.

The long sticks arranged without gluing.

The short sticks arranged without gluing.


Step 5:
Once you get an arrangement you like, it's time to start gluing. Pick up the mirror but leave all of the sticks in their arranged places.  I used a hot glue gun because it sets quickly. Now start gluing in the same order you arranged the sticks. Start with one long stick and glue it to the backside of the mirror, about an inch up. Glue all of the long sticks on and go on to the short ones. 


It will look a little messy but you won't see it from the front.


Step 6:
After the glue has cooled and set, you can pick up the mirror by the piece of wood you mounted on the back of the mirror. Be very careful not to touch any of the paint sticks or they will easily get knocked off. While transporting my mirror in my car a few sticks actually got knocked off so I had to re-glue them. 

starburst mirror, DIY, mirror, homemade, craft, bar car, inexpensive, project, sunburst mirror, pink, A Hammer & Heels


I'm very pleased with the results! Gluing them on looks like a process but it actually went pretty smoothly. Don't worry too much about arrangement, just make sure you are gluing them the same height around the mirror otherwise when you flip the mirror over it won't be in the "center". 

Let me know what you think! Share any tips or comments below.

Wednesday, September 4, 2013

Wednesday Wish List 9.1

J.Crew, print, rings, clothing, camo, skinnies, pants, Fresh, perfume, fragrance, wish list, a hammer & heels, feline, celfie, whowhatwear


Ship in a Bottle Print I'm still looking for a few more prints for my gallery wall and instantly fell in love with this. Plus, it's only $10! // Double Finger Wood Ring Last night I discovered this crafty jewelry shop that uses almost all organic materials for their jewelry. Everything has a cool, natural feel using different kinds of wood, ceramics, and leather. // Fresh Brown Sugar Fragrance  Carroll and Lauren surprised me with a birthday present this past month and ever since I've been hooked on this sweet and unique scent that I need to stock up. // Skinny Jean This fall I'm digging dark green and camo. // Feline Tee Have you noticed all the different graphic tees popping up lately? This Celfie (get it?) tee is pretty clever inspired by the CĂ©line craze, and WhoWhatWear's LOVE tee is cute but they sold out so quickly I didn't get my hands on one. I'm a cat lover so this tee is even more perfect.


Monday, September 2, 2013

What I Bought in August

J.Crew, h&m, Urban Outfitters, fall, purchase history, A Hammer & Heels, clothes, corduroy,

J.Crew, h&m, Urban Outfitters, fall, purchase history, A Hammer & Heels, clothes, corduroy,

J.Crew, h&m, Urban Outfitters, fall, purchase history, A Hammer & Heels, clothes, corduroy, midi ring, earrings, gold, jewelry


Happy Labor Day! I had a blast with friends this weekend as college football kicked off another season. Go Cyclones! Unfortunately we didn't come away with a win but we still had fun celebrating. 

It's hard to believe summer has come and gone already. I'm back in school for my final year and fall is upon us. Whoa. August was good-- it's my birthday month and I went on a cool vacation to DC. My purchase history looks a bit sparse this month, but my new handy dandy camera is not pictured since I was using it to, uh...take pictures. It's a Canon T3i and 18 55 mm lens. We all knew how bad I needed to invest in a camera other than my iPhone. After lots of research and many recommendations I decided  to go with a Canon and ended finding a HUGE deal on it. Couldn't be more happy with my choice!

The palm print blouse from H&M was actually my only clothing purchase while on vacation. I've worn it several times the last few weeks just squeezing the last bit of wear out of it I can before fall. 

Pineapple tee from J.Crew found on sale. I couldn't pass up a cute tee like this.

Matchstick cords from J.Crew. So excited to break these out for fall with cute wedge booties and a sweater. 

Midi ring and earrings from Urban Outfitters. 


Friday, August 30, 2013

Update: Couch Makeover

DIY, couch, makeover, home, decor, interior design, textiles, style, pillows, pink, orange

DIY, couch, makeover, home, decor, interior design, textiles, style, pillows, pink, orange

DIY, couch, makeover, home, decor, interior design, textiles, style, pillows, pink, orange

DIY, couch, makeover, home, decor, interior design, textiles, style, pillows, pink, orange

DIY, couch, makeover, home, decor, interior design, textiles, style, pillows, pink, orange
This is what it looked like before...

Remember when I first started working on my couch makeover way back when in May? Well I finally finished up sewing all of the pillows this past weekend and couldn't be happier with the results! No, it didn't actually take me 3 months to sew 5 pillows-- I began at my parent's house and then was able to finish them when I got back there again (I don't have a sewing machine.) Has anyone sewn pillows with zippers before? It can be a little difficult to get the hang of at first since I am not a seamstress by any means. 

The easiest way to cover the couch without reupholstering the whole thing was a slip cover. I actually found mine at Wal-Mart for about $40 which is a very reasonable price when we're talking about a couch. It doesn't fit perfect and there are areas I have to tuck it into the cushions for a more fitted look, but it works. 

My apartment makeover is coming along nicely and I can't wait to completely finish and share it with you guys! In between classes, work, and blogging I make changes, come up with new ideas, and finish more DIY projects -- all of which I will be sharing! I have some shelf styling and a dresser makeover yet to complete and then hopefully I will give the big reveal in a few weeks! Stay tuned.

What do you think about the couch and pillow cushions? 
Related Posts Plugin for WordPress, Blogger...