Pages

Friday, February 28, 2014

Best Blazers Under $100

best blazers under 100 dollars


I think I'm officially declaring Fridays as Fashion Fridays. Every Friday on the blog here we'll talk anything fashion related to mix up the blog a bit and gush about the latest and greatest trends, because who doesn't love talking fashion? I love fashion and am really trying to make a point lately to define my personal style better and stick with what works. When it comes to interiors I love bright colors, patterns, pink (that one is slowly fading) and a touch of glam. My wardrobe, however, is a different story. You'll find lots of darker colors, grey, faux leather jackets, and some spikes even. My personal style definitely leans toward the edgy side, but I also have a few happier pieces as well. In other words, my style is ALL over the place, which I don't like. Usually people can perfectly describe their style, so I am making it a goal of mine to "define" my best style and intentionally purchase clothing that reflects that. It's a little challenging because I am not sure exactly how to define my personal style. I know what I like when I go shopping, but I want to be better about not just purchasing random pieces but rather picking out items that work together and reflect the style that I want to portray. Does that make sense? I'm starting out by picking bloggers whose style I like as inspiration when shopping. I know I mentioned on here before I love Sally and Molly's classic and timeless style of A Piece of Toast, and I also love the brighter, more feminine style of Rach of Pink Peonies. If you have any advice on defining your style I'd love to hear it!

It all started when I was listening to the The Lively Show with Jess Lively and Liz Schneider. They were talking fashion and Liz was discussing her classic, preppy style and I was trying to decide what my style was. That's when I realized I didn't really have one. Liz also mentioned dressing for her body type and eliminating the "paper bag" shirt which I am now consciously thinking about every morning as I get dressed. I recommend listening to the podcast if you haven't already! I'm hoping this helps rid the "I don't have anything to wear" moments and eliminates the sad, neglected clothing hanging in my closet.

One thing I love that is currently working in my wardrobe are blazers. I'll (hopefully) be starting a job after graduation in just a couple months and blazers will definitely be worn on repeat. They are flattering on and reflect the classic yet feminine style I want. Here are a few of my favorite blazers under $100!

Happy Friday!


Wednesday, February 26, 2014

Make It: Tree Stamp Pillow

diy tree stamp pillow

diy tree tamp pillow

diy tree stamp pillow

diy tree stamp pillow

I am pretty surprised with how well this DIY turned out and how easy it was to actually make. I have definitely had those projects that turn out different than expected or end up being way more work than anticipated, but I was pleasantly surprised with this one. For all DIY novices out there, this is not as challenging as it looks!

It all started when I saw this photo on Pinterest. I loved the natural element and simplicity of the evergreens. I didn't however, love the price. As a true DIYer, I instantly thought to myself, I can make that. 

Let's get started…


Supplies:

1 large potato, $1
fabric paint, $1
paint brush
pillowcase, set of 2 for $9 at Target
knife
pencil
scrap cardboard/magazines
__________
Total  $11


Step 1
Cut the edge of your potato, creating a flat surface. Next, draw your shape onto the flat side of the potato. I found a pencil worked best because I was able to lightly carve out the shape; a pen didn't show up.


Step 2
Now it's time to cut out our your shape. Start by tracing the shape with a knife, cutting about 1/4 inch into the potato. In order to create a stamp, you want to cut out around your shape. I did one branch at a time, cutting around the edge of the shape and cutting 1/4 into the potato until the extra popped out. Keep doing this around the whole shape. Don't worry if you cut away a part of your shape you don't want to, just glue some potato and let dry. Then recut to form your stamp. I cut away too much of the bottom branch and a little Gorilla Glue worked great.


Step 3
Test your shape! After you cut out your stamp, grab a scratch sheet of paper or cardboard (or scrap fabric if you have it) and apply a generous amount of paint onto your potato stamp and spread evenly with a brush. Press your stamp firmly onto your scratch material for about five second. Check out your shape and see if you need to make any changes.


Step 4
Now it's time to stamp your pillowcase. Insert cardboard or magazines inside your pillowcase to prevent paint bleeding through on the other side. Apply a generous amount of paint and evenly brush it across the stamp. Firmly press your stamp onto the pillowcase but be careful not to move it while pressing. Repeat until you have covered your pillowcase with lovely trees! Don't worry if your tree stamp is bare or has some empty spots; you can touch it up with your brush. It doesn't have to be perfect, that's part of what it makes it special!


diy tree stamp pillow


Monday, February 24, 2014

Style to Steal: Dalmatian Print

Hello! Did you have a fabulous weekend? On Sunday I attended the Midwest Bloggers coffee date and it was amazing! I met some great Iowa bloggers and they are all just the kindest and it was such a good learning experience. It was low key -- we sipped our coffee and just chatted about blogging. I love going to little events like that because we all learn from each other and I feel motivated and refreshed. If you are in Iowa and are looking to attend next time let me know!

If you scanned my For the Home Pinterest board you'd notice a recurring theme: lots of bright spaces full of color. Probably no surprise after touring my home. Nothing puts me in a better mood than a bright room with a little personality showing through in color combinations, prints, and fun decor. Why settle for all white when you can use color, right? But then recently I stumbled across something. Black and white, in particular black and white spots. Aren't they adorable? I love a touch of playfulness the dalmatian spot adds to the otherwise neutral palette.

Here's a little eye candy for y'all...

black spot curtains by furbish studio

dalmatian print pillows

dalmatian print curtains

black spot headboard by kristin jackson

black spot caitlin wilson rug

dalmatian print wallpaper

dalmatian print chairs

1 / 2 / 3 / 4 / 5 / 6 / 7


Good, no? The chairs are actually an IKEA hack using only a permanent marker!


black spot rugs, pillows, prints, and chairs for your home


Dalmatian print pillow / Lulu & Georgia spots print / Caitlin Wilson spot rug / Spotted DIY chair

Today is the LAST day to enter the giveaway to win a fabulous Mishqua handbag. If you haven't already entered, click here

Friday, February 21, 2014

My Home on The Everygirl - Resource List

amanda risius the everygirl home feature

You guys, I am still smiling from all of the feedback on Facebook, Twitter, Instagram, sweet comments, and just all around love following my Everygirl Home Tour. I was in a bit of a shock at first when I pulled up the feature and saw my home in the pages of my one of my favorite websites. Truly an honor to be featured alongside such successful women. Doing something like this and giving you a peek into my apartment is always a bit nerve-racking because I don't know how you will react or if you will like it. I have read almost every single home tour on The Everygirl, and I am always inspired by everyone's home and the wonderful way they decorated it, so I hope you were just as inspired by mine. Yesterday was a bit of a whirlwind. I was sitting in class when the feature went live and lost all hope of listening to lecture. All I wanted to do was respond to comments on social media!

To help answer your questions where I purchased my furniture, decor, and accessories, I put together a resource list with prices of everything, just so you can get an idea of where the $500 was spent. As I was putting this together I noticed the only thing I didn't purchase on sale was the Anthropologie monogram mug and items for DIY projects. What can I say, I like a good bargain! If you see something in the tour that isn't included in this list or if you have any more questions regarding my apartment or interview (or anything else), let me know! I love hearing from you and getting your feedback.


Resources of Note:

amanda risius the everygirl home tour

amanda risius the everygirl home tour

amanda risius the everygirl home tour

amanda risius the everygirl home tour

amanda risius the everygirl home tour

amanda risius the everygirl home tour


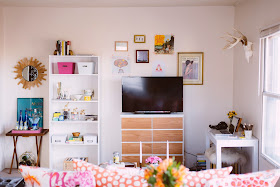
Living Room
Couch, loaned
Pillow covers, DIY
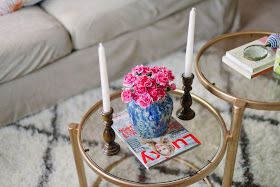
Coffee table, thrift - $6
Candlestick holders, old
Blue vase, Anthropologie - $6
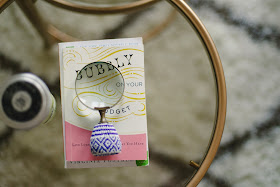
Magnifying glass, Anthropologie - $6
Parsons desk, Overstock - $50
desk stool, old
Gold picture frame, thrift - $3
"A" mug, Anthropologie - $8
Lizard stapler, Anthropologie - $6
Shag rug, RugsUSA - $100
Dresser/TV stand, DIY
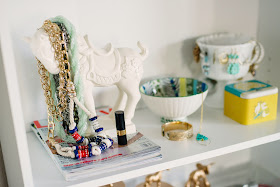
White shelf, Target
Ceramic horse, Target - $13
Green and blue bowl, Anthropologie
White bowl, thrift -v $3
Safari canisters, DIY
Blue mini frame, Anthropologie - $8
Acrylic jewelry box, thrift - $6
Photo boxes, Hobby Lobby - $6
Wooden bowl, handmade
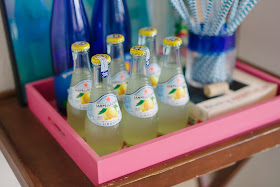
Wooden bar cart, thrift - free!
Pink tray, Hobby Lobby - $3
More mojitos please art, DIY
Sunburst mirror, DIY

amanda risius the everygirl home tourGallery Wall
Album covers, thrift $1 each
Frames, thrift - $6
"A" print, Pearls and Pastries - $5

amanda risius the everygirl home tour


Kitchen 
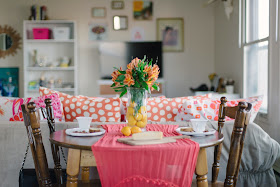
Table and chairs, old
Table runner, scarf from Forever21

amanda risius the everygirl home tour

amanda risius the everygirl home tour

amanda risius the everygirl home tour


Bedroom
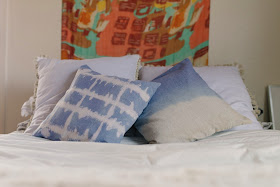
Scarf headboard, boutique - $25
Bedding, Pottery Barn, Zara Home, and Younkers - $20 for the pom pom Zara pillow covers
Dip-dye pillows, DIY
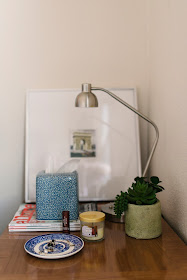
Side table, old
Lamp, Target - $20
Frame, Target - $13
Plate, thrift - $3

Unfortunately most of the items in my apartment aren't available anymore since they were purchased on sale or thrift, so I put together a few other great options for you. Thanks again for all your support and love!


Photo by Justin Salem Meyer 

Wednesday, February 19, 2014

Look for Less: Edgy Plaid


plaid shirt, edgy plaid outfit, hammer and heels, zipper skirt, get the look for less

Skirt / Plaid Shirt / Blazer


I'm looking to do more fashion-related posts on the blog. I LOVE clothes and fashion, but I haven't been doing lots of fashion posts because I wasn't online shopping and scouring the sites looking for outfit ideas, etc. Not because I didn't want to, I just want this blog to be authentic and a true representation of who I am…and my everyday life. Since I wasn't online shopping and creating wish lists anymore, I decided to discontinue that series for a while. Now I plan to bring fashion back to the blog in a different way, starting with this post!

I do my fair share of Pinterest browsing and come across plenty of swoon-worthy outfits. Don't we all? It's always a bummer after clicking on the outfit for links and finding out they are out of your price range. So I want to recreate some of my favorite looks for less. Style for all budgets baby!

I'm loving this casual yet edgy outfit. Plaid has been a favorite this season and I love the look paired with structured pieces like a blazer. 

Do you have an outfit you'd like recreated in a budget-friendly version? Send it my way and I will feature it on the blog! 

P.S. Don't forget to enter this giveaway for your chance to win an amazing handbag!

Monday, February 17, 2014

Style to Steal: Copper Decor + A Handbag Giveaway!


 1 / 2 / 3 / 4 / 5 

Copper is the metal of the season. More muted than gold, copper looks beautiful combined with crisp whites and grays. It's simplistic and pure perfection in my eyes. Thoughts? I think it's a nice change from the gold we have been bombarded with over the years (don't get me wrong, I still love me some gold!) My favorite copper look is lighting. There is something so special about statement-making light fixtures that aren't obnoxious.

I rounded up a few of my favorite pieces -- and the best part is they are all under $50.


On another note…I am so excited to team up with Mishqua for a handbag giveaway! Mishqua is a vegan fine handbag line founded by none other than Mishqua herself. I am so obsessed with every single bag and she is the absolute sweetest. As I prepare for graduation and starting my career, I understand the importance of a great, stylish bag that can hold my laptop, planner, and all the essentials. The woven tote and the seamed tote are roomy enough for the office or running errands and the perfect accessory to any outfit.

Enter the giveaway for your chance to win the woven or seamed tote. Leave a comment telling us which bag you would choose as the winner! The giveaway ends on February 24th. Good luck!

a Rafflecopter giveaway

Friday, February 14, 2014

What's in my Old Navy Shopping Cart


Happy Valentine's Day (and Friday)! Whew. Between classes, homework, blogging, work, interviews, and lots of time working on my portfolio, I feel like I was going 100 mph and staying up late just to get everything finished in time come the weekend. Since my boyfriend is working this weekend (he works 24 hours straight), we won't be celebrating Valentine's Day tonight, but I am hoping to relax a little at least. Do you have any fun plans?

A couple weeks ago I mentioned I've been in no-spend mode lately, but my wardrobe is starting to suffer a little. I honestly haven't purchased a piece of clothing since December! Impressive, I know. With spring right around the corner (only a month until spring break!!), it's time to add a few pieces to my dwindling wardrobe. I'll be starting a big girl job in a few months and need some new duds, so I'm looking for "office-friendly" items that can be dressed up or down. Old Navy's newsletter conveniently popped in my inbox this morning and I was sold the moment I read, 30% off everything. I was never really much of an Old Navy shopper until the past 6 months or so. I kept seeing A Piece of Toast wearing their stuff and raving about the Rockstar jeans, so I needed to give them a try. A while back I purchased the Rockstars in camo and I loved them! The fit is fantastic, they are so comfortable, and they don't stretch out bad. AG jeans were my go-tos, but I have to say, the Rockstar skinnies are my new faves. You seriously can't beat the price at $30. I'm stocking up on Rockstar skinnies, especially since my current AG skinnies seem to be stretching out (or my workout is working?).

After browsing Old Navy's entire site, here's what is in my shopping cart. For some reason Old Navy doesn't let me create a board with all the different images, so you'll have to click the links to see. Go ahead, treat yo'self!

Come back on Monday for a fantastic giveaway!

Heels / Navy Coated Skinnies / Tuxedo Stripe Skinnies ($10!!) / Boots / Zebra Sweater / Workout Capris / Stripe Chiffon Button Down / Chambray Shirt / Woven Sweater


Image 

Wednesday, February 12, 2014

Hey Foxy Ladies + Downloadable Valentine Card


hey foxy lady downloadable valentine card
How are you? My week is CRAZY busy with work and school yet full of some exciting things I can't wait to share with you.  Next week we have another giveaway and you will finally get a tour of my apartment. You won't want to miss it :) 

I'm obsessed with foxes lately and wanted to create a valentine card for you to send to friends. This was just waiting to happen. I love cards that are so simple and cute. You can download your valentine card here.  I hope you like it!

Monday, February 10, 2014

Make it: Valentine Yarn Sign

wire yarn sign, neon sign, yarn sign, hammer and heels, diy valentine, diy blog, diy gift

wire yarn sign, neon sign, yarn sign, hammer and heels, diy valentine, diy blog, diy gift

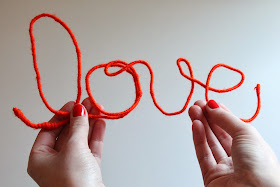
Did you have a good weekend? I had a great time with friends and visited my niece on Saturday. Being an aunt is so fun, I can't wait until she is old enough to start talking and walking. It was nice to relax and unwind a little as the upcoming weeks will be busy with tests, work, and job applications. With valentine's day coming up this weekend I wanted to do a DIY that was easy and cute to give your girlfriends for a fun gift. I did mine in the word love, but you could do anything! You could personalize it to the recipient's name, a funny saying, or something sentimental. It's a customizable and personal gift that is cute and thoughtful. It's also a great affordable alternative to the neon signs I loveThis, this, and this are a few inspirational photos of wire yarn signs to get you thinking.

The supplies:
yarn
12 gauge floral wire
scissors
Gorilla glue


I got my wire at a craft store. The floral wire is much more pliable and easier to shape than sturdy wire at Home Depot. 

Step 1
Start by dropping a dot of glue on the end of the wire and wrap yarn around the glue and wire to secure it in place. Make sure the glue is dry, because this is what keeps the yarn from unraveling as you're wrapping. Once it's dry,  start by wrapping the yarn tightly around the wine. It's easy to pile more yarn in spots, so just try to wrap it evenly around the wire to prevent "bulges."I wrapped enough yarn until I had about 6 inches of wrapped wire. 

Step 2
After I had enough wrapped wire to work with, I started forming the first letter. I chose to wrap the wire as I went, but you can shape the letters first and then wrap. Whatever works best. It did take a while to get the hang of wrapping the yarn and shaping the letters, but it went fast once I did. 

Step 3
Once you reached the end of your word or phrase, drop a dot of glue on the wire and wrap the yarn around it like you did at the start. 

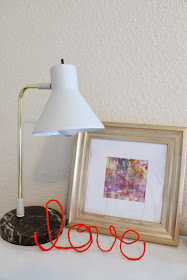
It only took 30-45 minutes to complete the word love. You could hang it in your gallery wall, or set it on a shelf. I double the letter o in love, so I could stand mine on a shelf or desk. 

p.s. Thank you to everyone who participated in the AreaRugs.com giveaway!! Emily Matras you are the winner! I will be e-mailing you shortly.